 Standard Operating Procedures
Managing PM Templates
PURPOSE:
The Preventive Maintenance (PM) Template screen sets up the details and schedules for PM work orders generated by AiM. PM templates are referenced by the PM generator to create automatically PM work orders.
- PM work orders can be set up to group all equipment/assets from the same property onto one work order.
- PM work orders can be set up to create a single work order for one equipment/asset but potentially with multiple phases. Each phase being assigned to a different shop/contractor.
- PM work orders can take into account seasonality and be generated only during certain times of the year.
- The Generation Buffer field enables users to specify the number of days before or after the planned date to allow the superseding to happen within, this defaults to the interval of the child PM (if time based).
PROCEDURE:
| 1. Choose “PM Template” from the Preventive Maintenance main menu. | 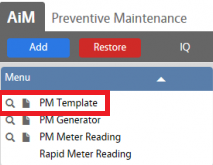 |
| 2. From this page, you can edit (adding equipment to a template would be the most common application) an existing PM Template or you can create a new Template.
To create a new template, choose the blue “New” button in the top left of the page. |
 |
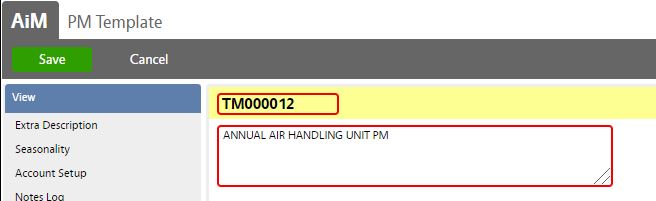
| 3. The Template will default to a sequential numeric name. This field IS editable and should be named similarly (as descriptively as possible) to the PM Standard that is to be used on the template e.g. TMxxxxxx (6 digits).
Fill in the description block with the appropriate description for the template and Frequency. |
 |
| 4. Currently, UCONN does not require this information in the template. If you would like to use these fields, please check with the FO&BS Asset Manager prior to doing so. |  |
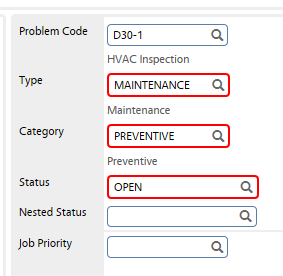
| 5. Next, select the problem code by clicking on the magnifying glass associated with that field. Note that for much preventative work, you should select the “inspection” choice related to the trade doing the task (see picture).
Similarly, choose the appropriate type and category (most often Maintenance and Preventive respectively).
Choose “Open” for the status. This is the status that the work order will be created in by the PM Generator.
UCONN FO&BS is not currently using Nested Status or Job Priority. |
 |
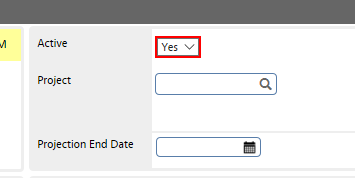
| IMPORTANT!!!!!!!!
6. The Projection End Date sets the last date that the PM Schedule Date Generator will generate future PM release dates for this particular Template.
The Active box will default to “Yes“; unless you are inactivating the entire Template, leave it at Yes.
UCONN FO&BS currently does not use the project field on the PM Template page.
|
 |
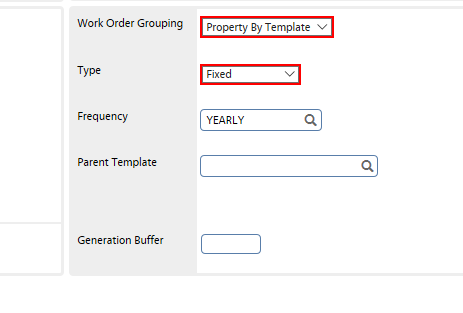
| 7. The Work Order Grouping field allows you to select whether the equipment for each property will be grouped under one work order OR by the singular asset (lending the possibility of multiple phases per asset).
Definitions for the Type field are listed below:
Fixed: (Most often used by FO&BS) A PM work order will generate on every scheduled date. The PM Generator Screen disregards the status of the previous PM work order. A frequency is required if the fixed type is selected.
Timed: A PM work order will generate one frequency period after the previous PM work order has been completed (the phase[s] must have reached a status of PM Complete). At that point, AiM updates the PM last date field and a new PM will generate, one frequency period later. A frequency is required if the timed type is selected.
Calendar: A PM work order will generate on each fixed date entered in the scheduling calendar. When this type is selected, the Calendar Dates Option View becomes available.
Metered: A PM work order will generate when a specified meter reading interval has been reached. When this type is selected, the interval field becomes available which enters the value that will trigger the generation of a PM work order. The actual meter readings are entered in the Equipment/Asset Meter Screen or the PM Meter Reading Screen.
Fixed/Metered: When this type is selected, both the interval and frequency fields become available, which enters the values that will trigger the generation of a PM work order.
8. Next, select the appropriate frequency for the template (should generally be included in the Template name and description). If you require a frequency that is not currently listed, please speak with the FO&BS AiM Administrator or Asset Manager.
The Parent Template is not currently being used by FO&BS but can be used to create “nested” PM templates.
|
 |
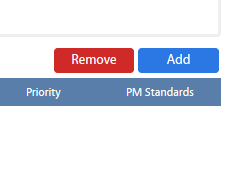
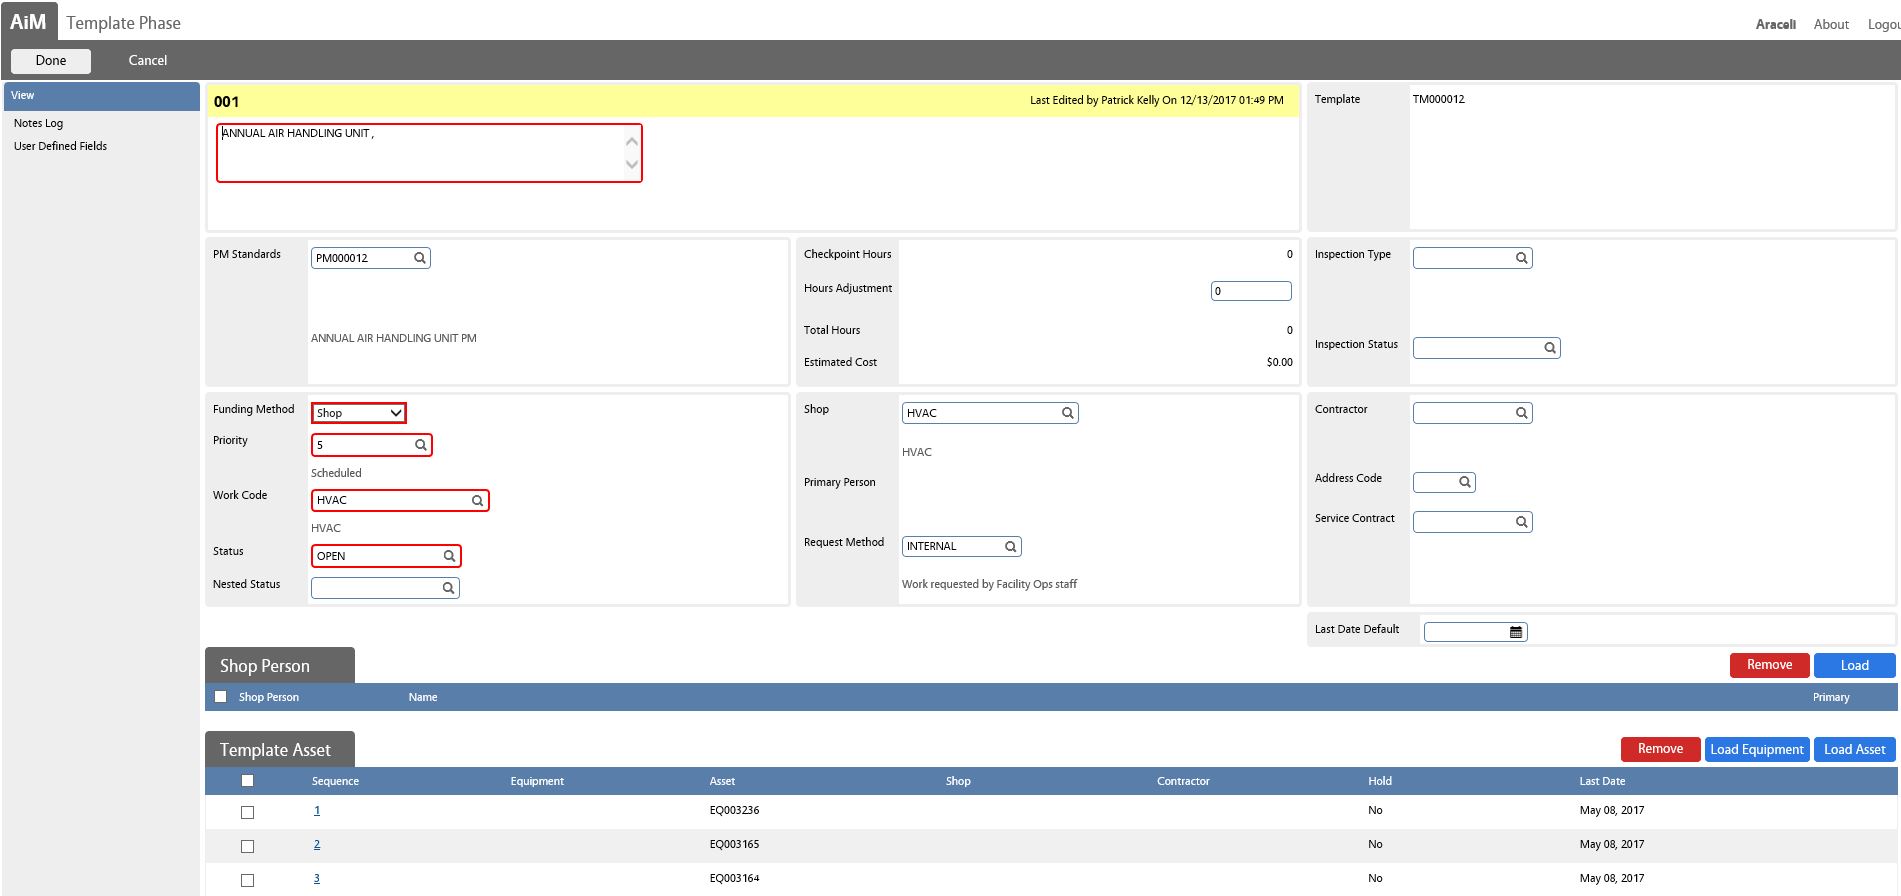
| 9. In order to configure the Template Phase, choose the blue “Add” button pictured to the right.
10. Enter Template Phase description (e.g. use the same as the template description).
11. Then, set:
|
|
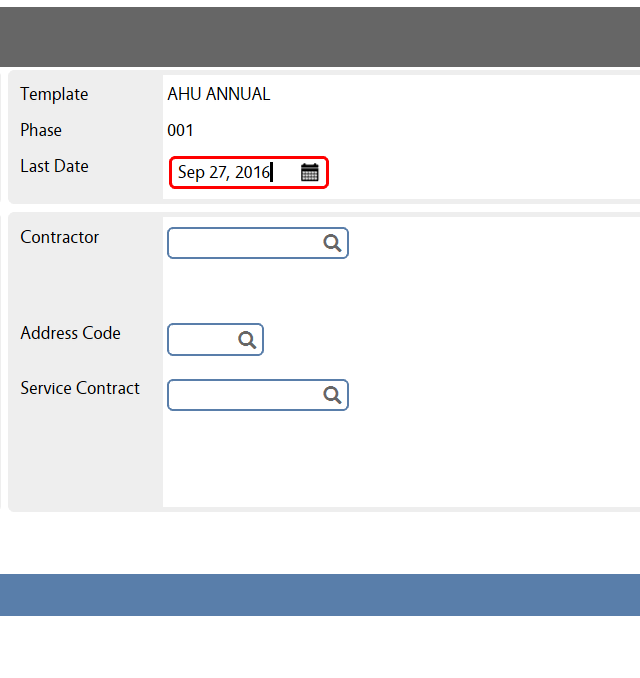
| 12. Note the “Last Date Default” field. Each asset has to have the “Last Date” populated in order for the PM generator to generate work orders for that equipment. Using this field can help to set a single schedule for a desired set of equipment records. |  |
| 13. To load assets, Select the blue “Load Asset” button in the bottom, right of the Template Phase screen. | 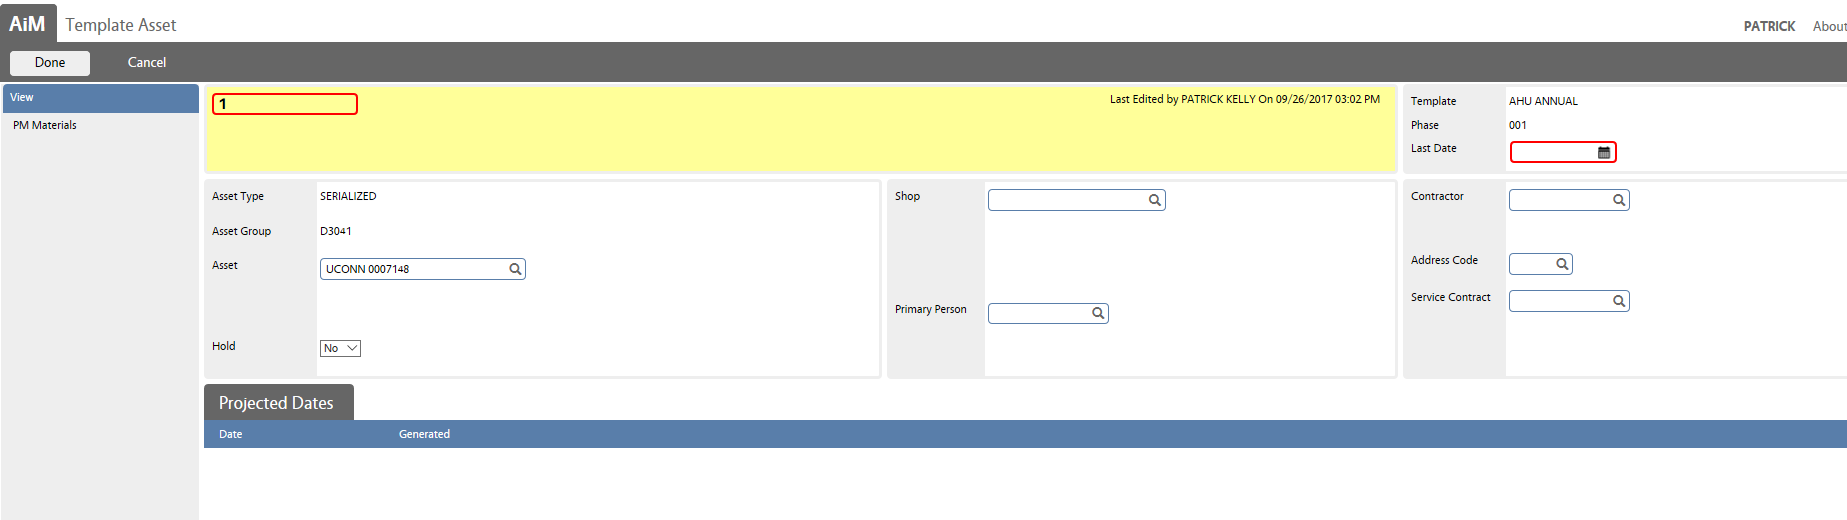 |
| 14. Depending on your purpose, searching by asset group and/or property are likely the most effective ways to search. After you have selected your criteria, click the blue “Execute” button on the top left of the screen. | 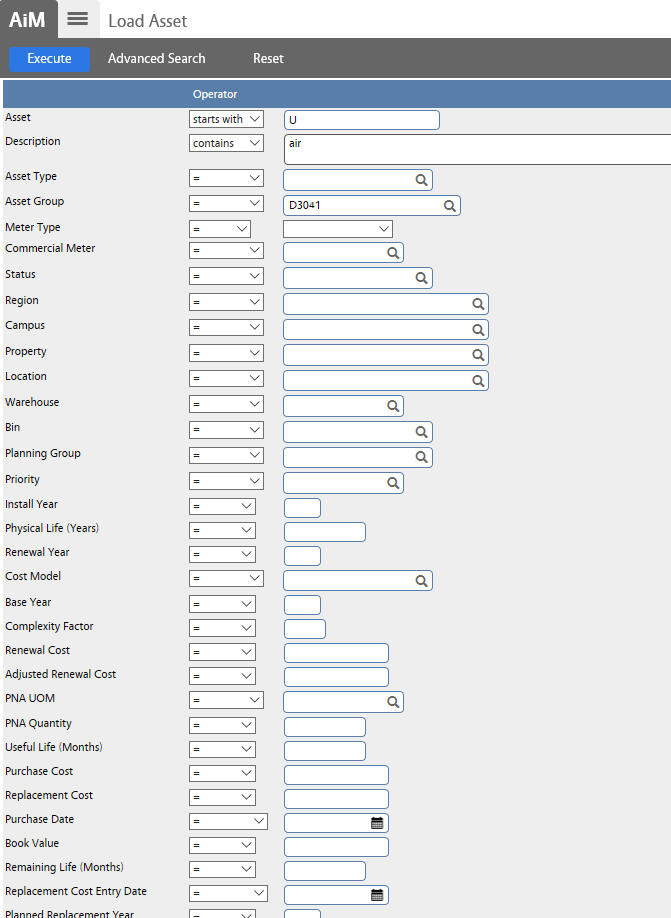 |
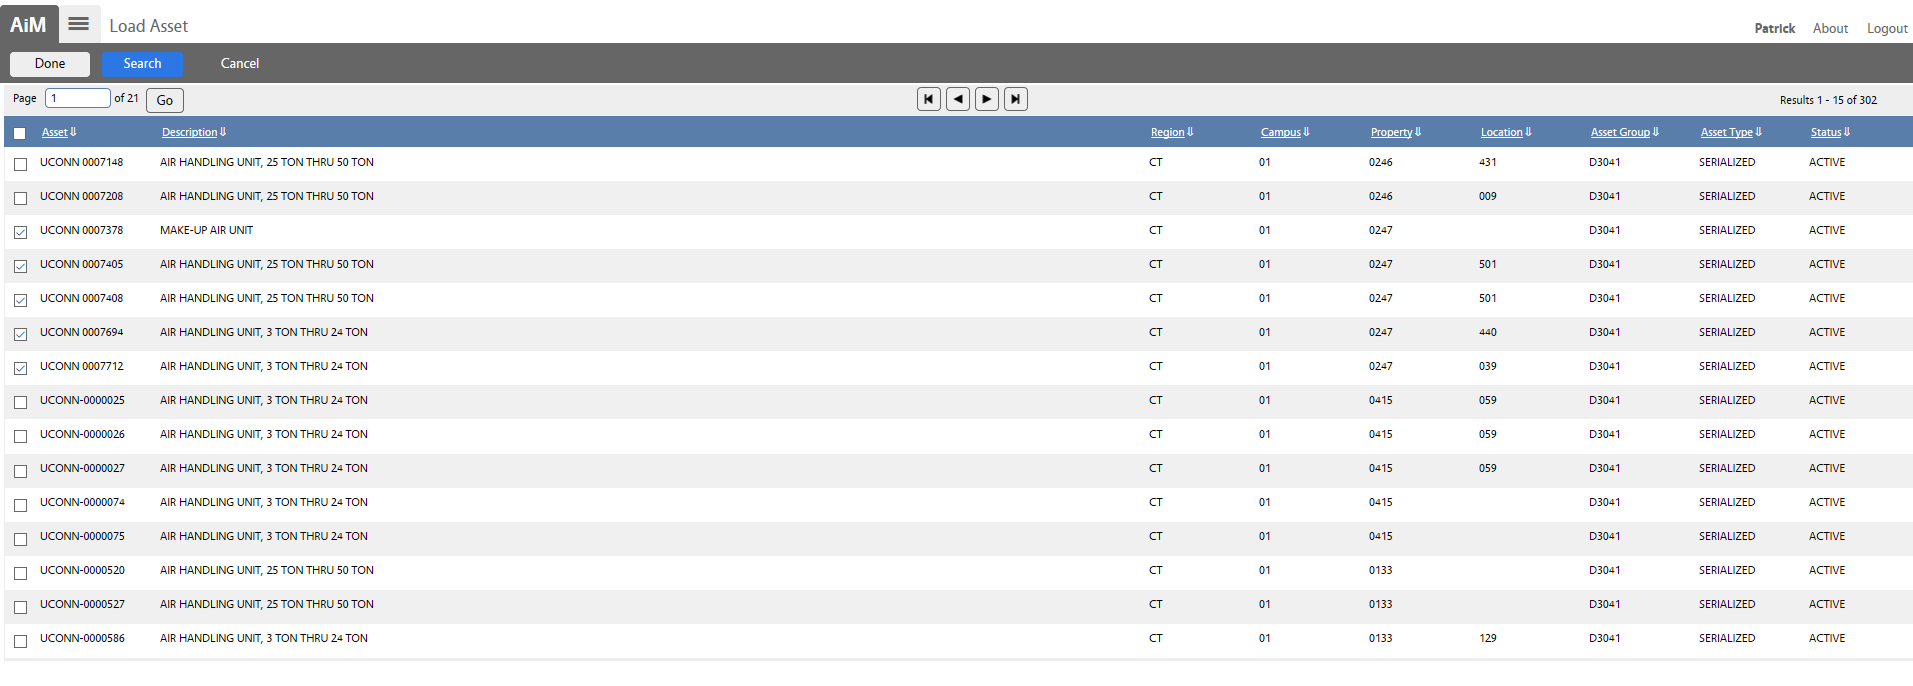
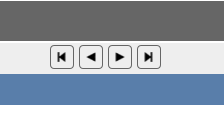
| Note that the assets will display 15 per page. Use the navigation arrows pictured here to view more assets retrieved by your search criteria.
15. Click the check boxes associated with the assets you desire to add to the Template Phase and then click on the gray “Done” button at the top, left of the page. |
  |
| Note if you did not enter a last date default, you will now need to enter a last date for each asset that was loaded. Click on each asset sequence number in order to edit the last date field. Click the gray “Done” button to return to the Template Phase screen. And then click the gray “Done” button again to return to the PM Template screen.
16. Click “Save” and the PM Template is complete. |
|


ROLES USED:
- Asset Manager: [TODO:FOBS define refine role here]
Return to Preventive Maintenance Module SOP